Drywall Texture Removal Service
Removing drywall textures can be a very tedious and growling job. On top of the labor, it's important you don't damage the drywall in the process or else you'll be dealing with a whole other issue that will cost not only your time but money as well. It's best to leave drywall texture removing to the professionals! Get in contact with us today to book your free estimate!
How To Remove Drywall Texture
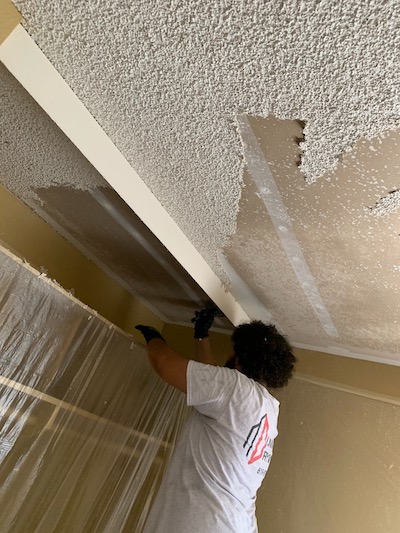
If you’re looking to change the texture from your walls, here’s what you need to know. You have two options, you can either scrap it off or you can cover it up. Which ever you choose, the job requires a lot of work and it is very messy so if you plan on doing this yourself, make sure to prep your work area with tarps and drop cloths. If you’d like to hire a professional to take care of this for you, then give us a call right now to book the next available appointment.

Prepare Area Where Texture Will Be Removed
Whether you choose to scrap or cover up you still need to prep your work area and as I mentioned before, this is a very messy job so be sure to remove or cover the furniture in the room. If you choose to cover the furniture, old sheets, tarps, and drop cloths work fine. Be sure to cover completely! If you’re worried about getting your furniture dirty, it’s best to just remove it from the room if possible.
Next step is to cover the entire floor with tarp. This makes for easy cleanup once we’re all finished. If you’re removing drywall texture from the ceiling then be sure to cover the walls as well.
Don’t forget your safety gear! Proper masks, safety goggles, and gloves are essential to protect yourself from the debris and possible lead paint trapped in the room.
Method 1: Texture Removal
Step 1: Start by thoroughly coating a small area with water with a spray bottle. Removing drywall require technique so be sure to start small so you don’t risk damaging the drywall. Let the water soak for a few minute until the wall feels soft to the touch. Spray some more water if needed.
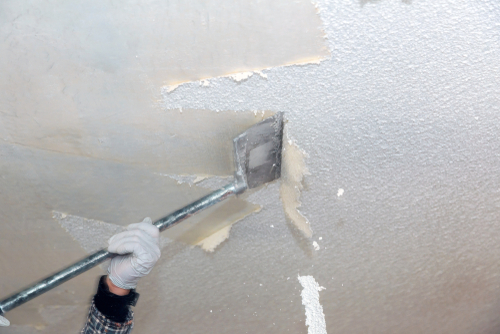
Step 2: Use the floor scraper or drywall blade to start removing the texture. Hold the tool at a 30° angle and set it against the wall and start scrapping, adjusting as you go. Some areas will require you to scrap harder or softer than others. Be careful not to damage the drywall underneath the texture. This could lead to more expenses. Continue around the room until all the texture is removed.
Step 3: Sanding down the rough spots. Once you’ve removed all the texture, be sure to go over any rough spots with a 60- to 100-grit range sand paper to smooth the surface. Remember not to sand too hard.
Step 4: Remove dust on the wall by using a damp sponge to wipe down the walls. Be sure to wash out the sponge from time to time.
Step 5: Time to apply the joint compound using a 6 inch long wallboard knife. Spread a 1/8 inch thick layer of joint compound across the wall, smoothing it out as you go. Be sure to complete each wall in once session to give it an even look and let it dry overnight.
Step 6: Once it’s dry, use a medium-grit sandpaper and sand down any rough areas to make a smooth surface. It’s highly recommended to use a dust drywall vacuum to make sure no dust floats into the joint compound during this next step.
Step 7. Apply 2nd layer of joint compound. Using a wallboard knife, apply a thinner layer of joint compound, focus on filling in low spots. Wait till the next day to start Step 8.
Step 8. Use a medium-grit sandpaper to smooth out the wall once again. Vacuum the dust afterwards and it’s recommended to wipe down the walls with a damp sponge and let dry.
Step 9: Apply primer to your walls before you paint to create an open canvas for whatever you decide to paint.
Testimonials

See Our Work!
Get A Free Quote On Any Size Job!
Drywall Frequently Asked Questions!
A. For a typical drywall job, it will usually take 3-4 business days. Obviously depending on the size of the job it could be done in 1-2 days for smaller jobs or over 4 days for larger jobs.
A. We will supply everything to get the job done!
A. No one needs to be home, as long as we have access to the property. Usually clients would leave the key in a safe box or just hide it somewhere only they know where it’s located.
A. No dumpster is necessary. We will clean up after ourselves once the drywall job is complete.
A. Nope! Just a quick wipe down or sweep would be fine.
A. Yes! Of course! If anything were to happen during the drywall project, rest assure that we are licensed and insured.
